When pen testing web interfaces and REST APIs for mobile apps, intercepting the messages in Burp can be difficult, especially for those apps that do not respect the http proxy settings. The following guide will help you proxy all the information from your mobile device to a Mac and route specific messages of interest to Burp. We will setup a Mac to act as a proxy and route all of the mobile device’s data.
This guide assumes a few things:
1) Both of the devices need to be on the same network/subnet.
2) You have Burp and know how to use it.
3) You are familiar with basic routing; working with network settings on you mobile device and OSX command line.
4) The Mac device is running Sierra and Burp is version 1.7.22 (or there about)
On the Mac running Sierra, we will need to do a few things:
With Burp:
1. Start Burp
2. Goto Proxy -> Intercept, turn “Intercept is on” to “Intercept is off”
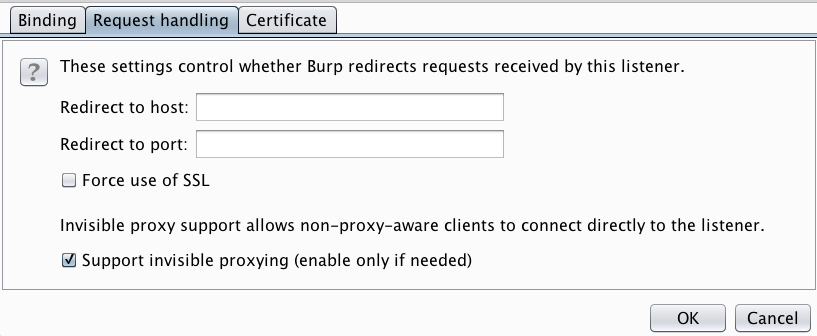
3. Goto Proxy -> Options and select the 127.0.0.1:8080 Proxy Listener and “Edit” it.

4. In the “Edit proxy listener” window, select the “Request handling” tab and enable “Support invisible proxying” and then select Ok.
 Note: You may also need to change the “Bind to address” under tab Binding to “All interfaces”.
5. While probably not necessary, I like to reset the Proxy Listener. Goto Proxy -> Options and uncheck and then check (selecting twice) the Running status for the 127.0.0.1:8080 Proxy Listener.
In OSX’s System preferences, under Security & Privacy, turn off the firewall. We will be forwarding all the data from the iOS device to the Mac and the firewall will prevent us from receiving. Do not forget to re-enable to firewall when you are done.
Next, we need to turn on forwarding. Once the Mac receives the data, it needs to forward it so information so it will be directed where it needs to go. Open Terminal and from the command line, run:
sudo sysctl -w net.inet.ip.forwarding=1
This command will prompt you for your password and tell the Mac to forward any data it receives to where it needs to go.
Now, we need to tell OSX to route specific messages to Burp. From the command line, run:
echo "rdr pass inet proto tcp from (Device IP Address) to any port 80 -> 127.0.0.1 port 8080" | sudo pfctl -ef -
This command will route messages from your mobile device using port 80 to Burp. Remove the ‘(Device IP Address)’ and put your mobile device’s IP address in its place. If you wish to route different ports (say 443 for https messages), then change 80 to the desired port. If you wish to route both 80 and 443, then change the 80 to 80:443.
Note: the ip forwarding and rdr settings will not persist after a reboot but the firewall will remain disabled.
Now, let’s setup the mobile device: For iOS (iPad, iPhone, etc)
Goto the wireless connection’s settings; in iOS, this is under Settings -> Wi-Fi and select the blue circled i. The device cannot use DHCP but you must configure all the settings manually. Select the “Static” tab and set the device’s IP address (the same as in the above rdr setting), subnet mask and DNS setting. For the Router (or Gateway on Android), set it to the IP address of the OSX Mac device running Burp. This will force the mobile device to send all of its data to the Mac.
On the iOS device, open a web browser and go to a web site that is on port 80; drudgereport.com should work. In Burp’s Proxy -> HTTP history, you should see the requests to the web site from the iOS device being captured.
Now that you are capturing the messages, you can utilize Burp’s capabilities for testing.